
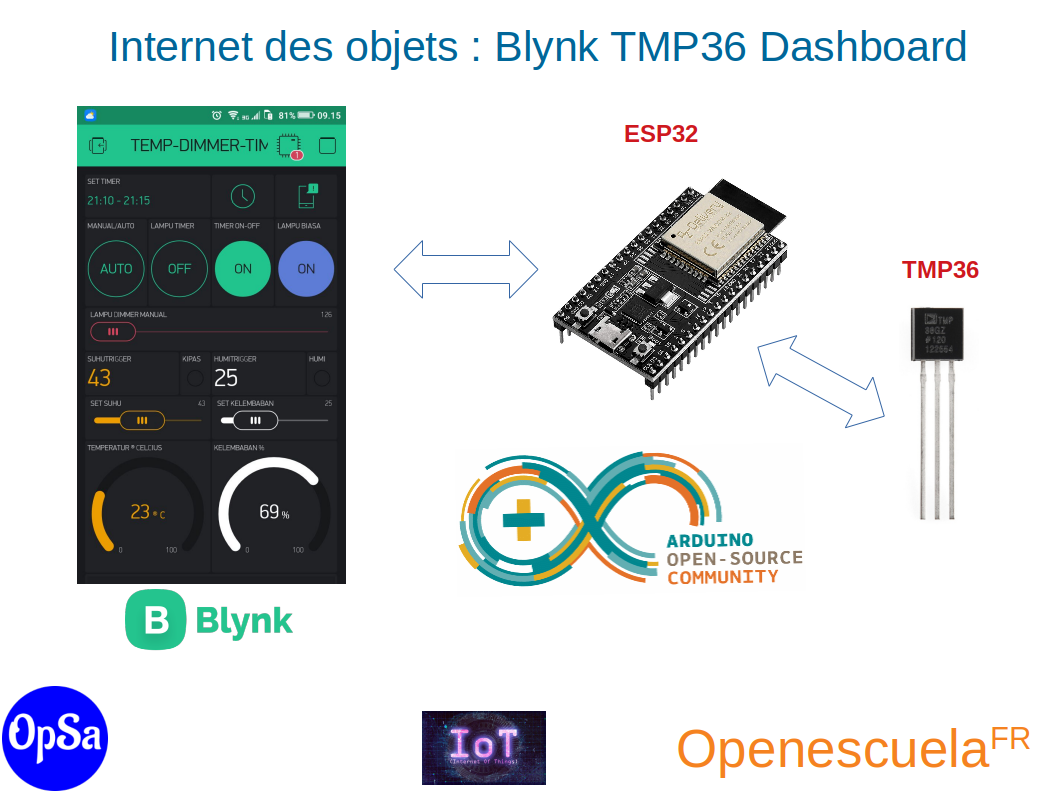
In this training, you will learn the basics of the Internet of Things. In this part, you will learn how to visualize on an IoT platform (Blynk) the data acquired from a TMP36 temperature sensor.
Temperature data acquisition program from the TMP36 using the ESP32 card:
int sensorPin = 34;
float pinVal = 0;
float voltVal = 0;
float tempVal = 0;

void setup() {
  Serial.begin(9600);
}

void loop() {
  pinVal = analogRead(sensorPin);
  voltVal = pinVal / 1024;
  tempVal = (voltVal - 0.5) * 100;
  Serial.print(tempVal); Serial.println("°C");
  delay(500);
}
Program to send temperature data to the dashboard:
/* Comment this out to disable prints and save space */
#define BLYNK_PRINT Serial

/* Fill-in your Template ID (only if using Blynk.Cloud) */
//#define BLYNK_TEMPLATE_ID   "YourTemplateID"


#include <WiFi.h>
#include <WiFiClient.h>
#include <BlynkSimpleEsp32.h>

// You should get Auth Token in the Blynk App.
// Go to the Project Settings (nut icon).
char auth[] = "743wLRFWj7tZz5o1VPyaoDmg42HQFx2c";

// Your WiFi credentials.
// Set password to "" for open networks.
char ssid[] = "opsa";
char pass[] = "op+sa=opsa";

int sensorPin = 34;
float pinVal = 0;
float voltVal = 0;
float tempVal = 0;
BlynkTimer timer;

void sendTemp()
{
  pinVal = analogRead(sensorPin);
  voltVal = pinVal / 1024;
  tempVal = (voltVal - 0.5) * 100;
  Serial.print(tempVal); Serial.println("°C");
  Blynk.virtualWrite(V3, tempVal);
}

void setup()
{
  // Debug console
  Serial.begin(9600);
  Blynk.begin(auth, ssid, pass);
  timer.setInterval(1000L, sendTemp);
}

void loop()
{
  Blynk.run();
  timer.run();
}


0 comment